This is a Mastodon thread. The original thread is available here:
This is a brief thread / blog post about how to create QR codes in a way that’s free, easy, and versatile, using the userfriendly open source application @Inkscape@mastodon.art
By the way, the blog post URL is https://sciencer.eu/posts/2025-09-free-and-easy-and-versatile-qr-codes.html.
QR codes are very useful to efficiently share information (usually URLs).
QR codes are quite versatile and robust; they’re not too demanding in terms of colors and shapes, and even have a degree of error correction allowing them to still be ‘legible’ to QR code readers even if part of the QR code is obscured.
This allows you to create QR codes consisting of circles, pills, or other shapes; in red, blue, or pink; and embed shapes such as logos while still keeping their functionality.
A number of websites exist that can help you do this, but there’s a better solution: the awesome open source application InkScape.
This quick & dirty blog post / Mastodon thread briefly talks you through that process.
First, if you don’t have it yet, get @inkscape@mastodon.art from https://inkscape.org and install it in the version for your operating system.
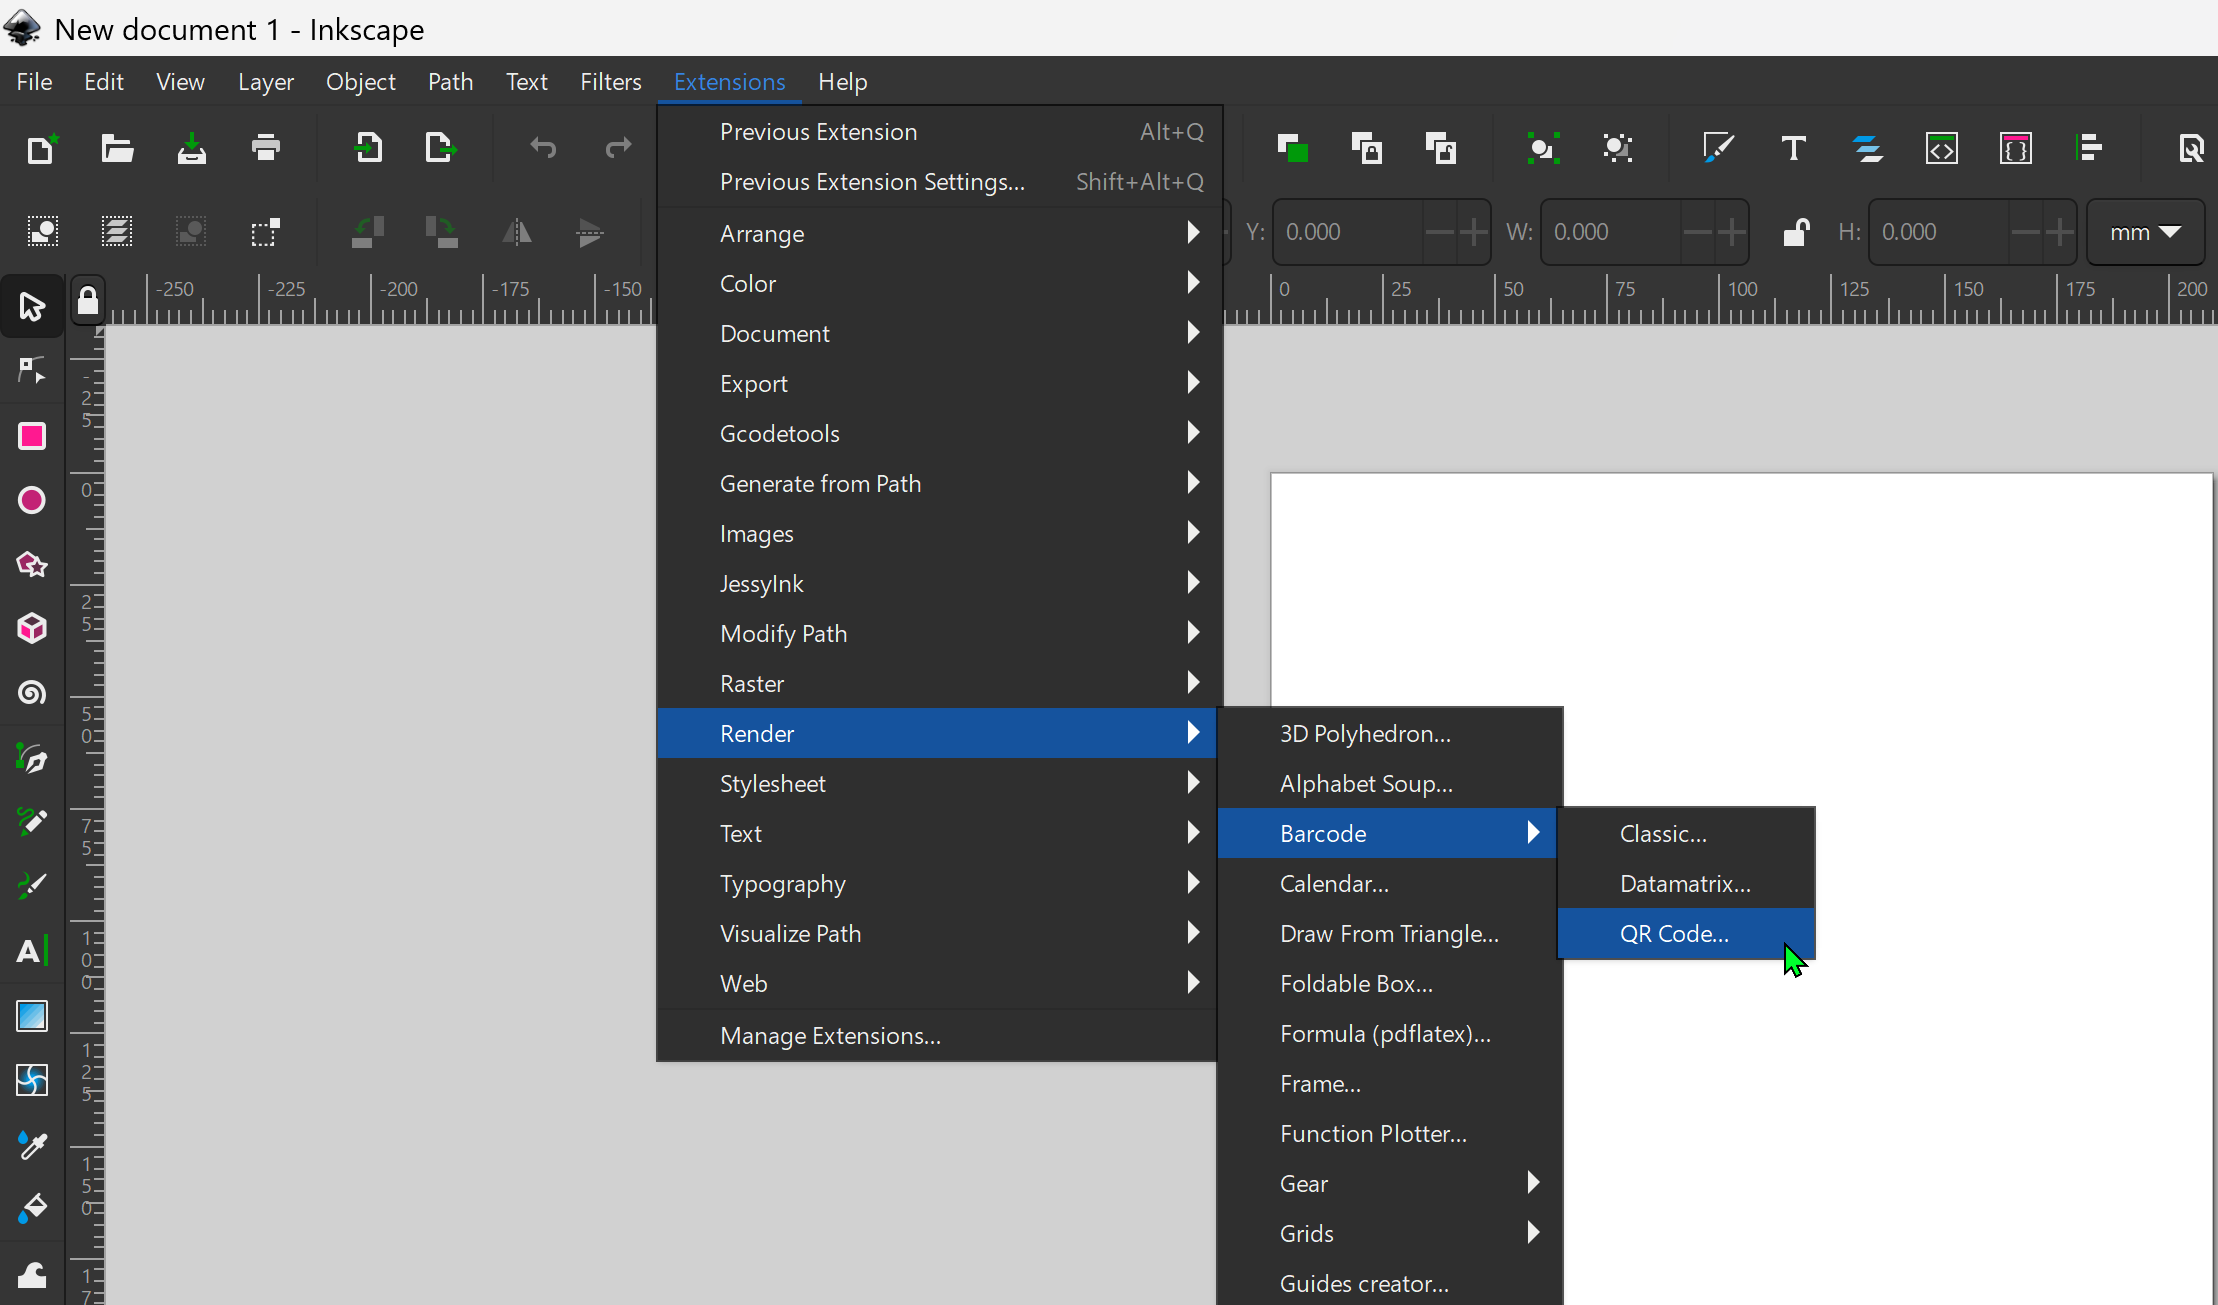
Then open InkScape and open an empty document. Open the “Extensions” menu, and in the drop-down menu, open the “Render” submenu. In that submenu, open the “Barcode” submenu, and in that submenu, select the “QR Code…” option.
In the QR code dialog, you can copy-paste the URL (or other text) you want to encode in the QR code. You can also select the error correction level (from Low, where 7% of the QR code can be recovered, via M(edium, about 19%) and Q(uartile, about 25%) to H(igh, about 30%).
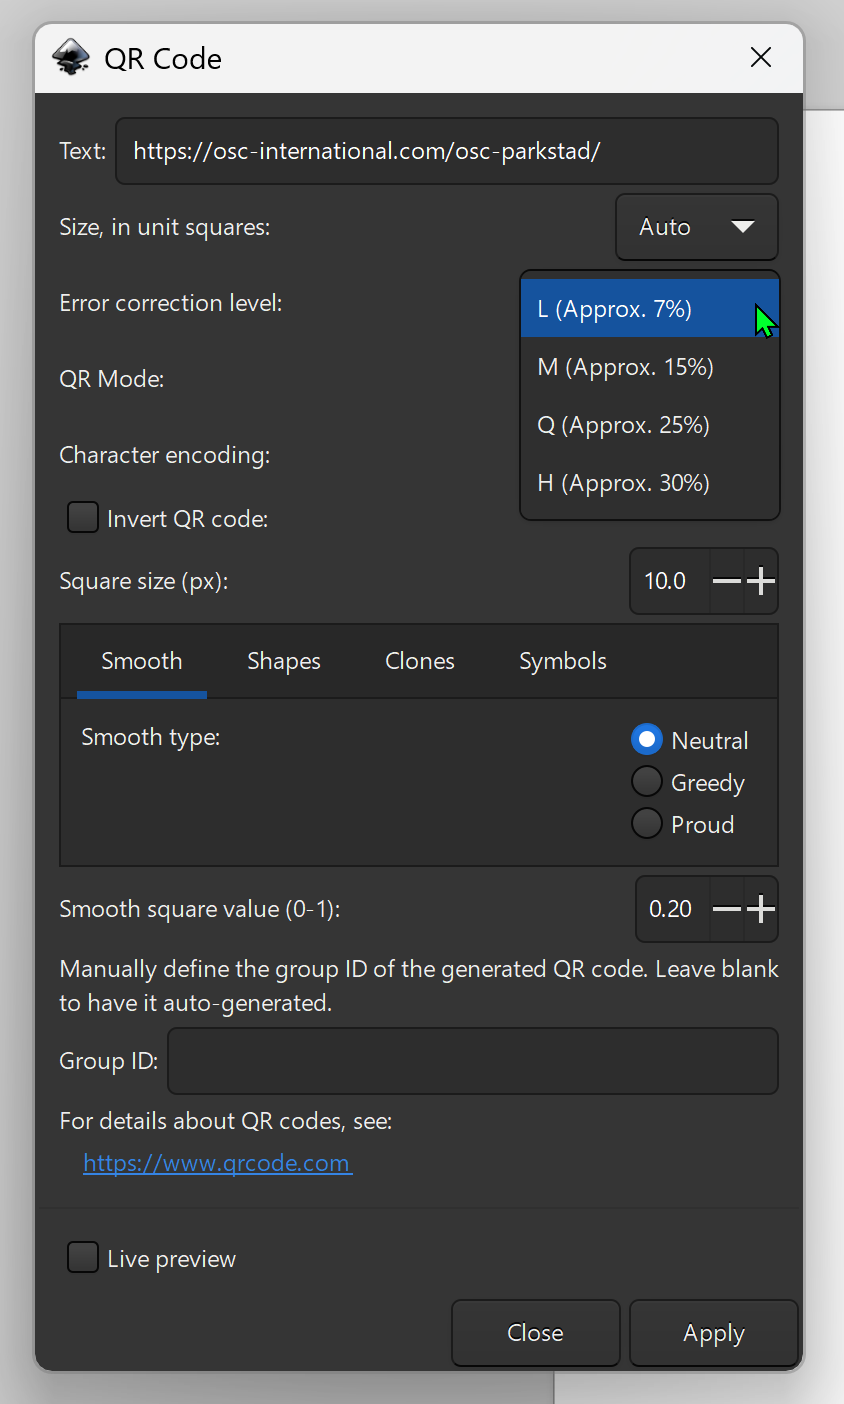
In that dialog you can aldo set other things. For example, the “Clones” section allows you to use, instead of the default QR “squares”, any shape you desire. The QR-code simply using the shape you have selected when creating the QR-code. You may have to play around a bit with the size of the object to get things working as you want.

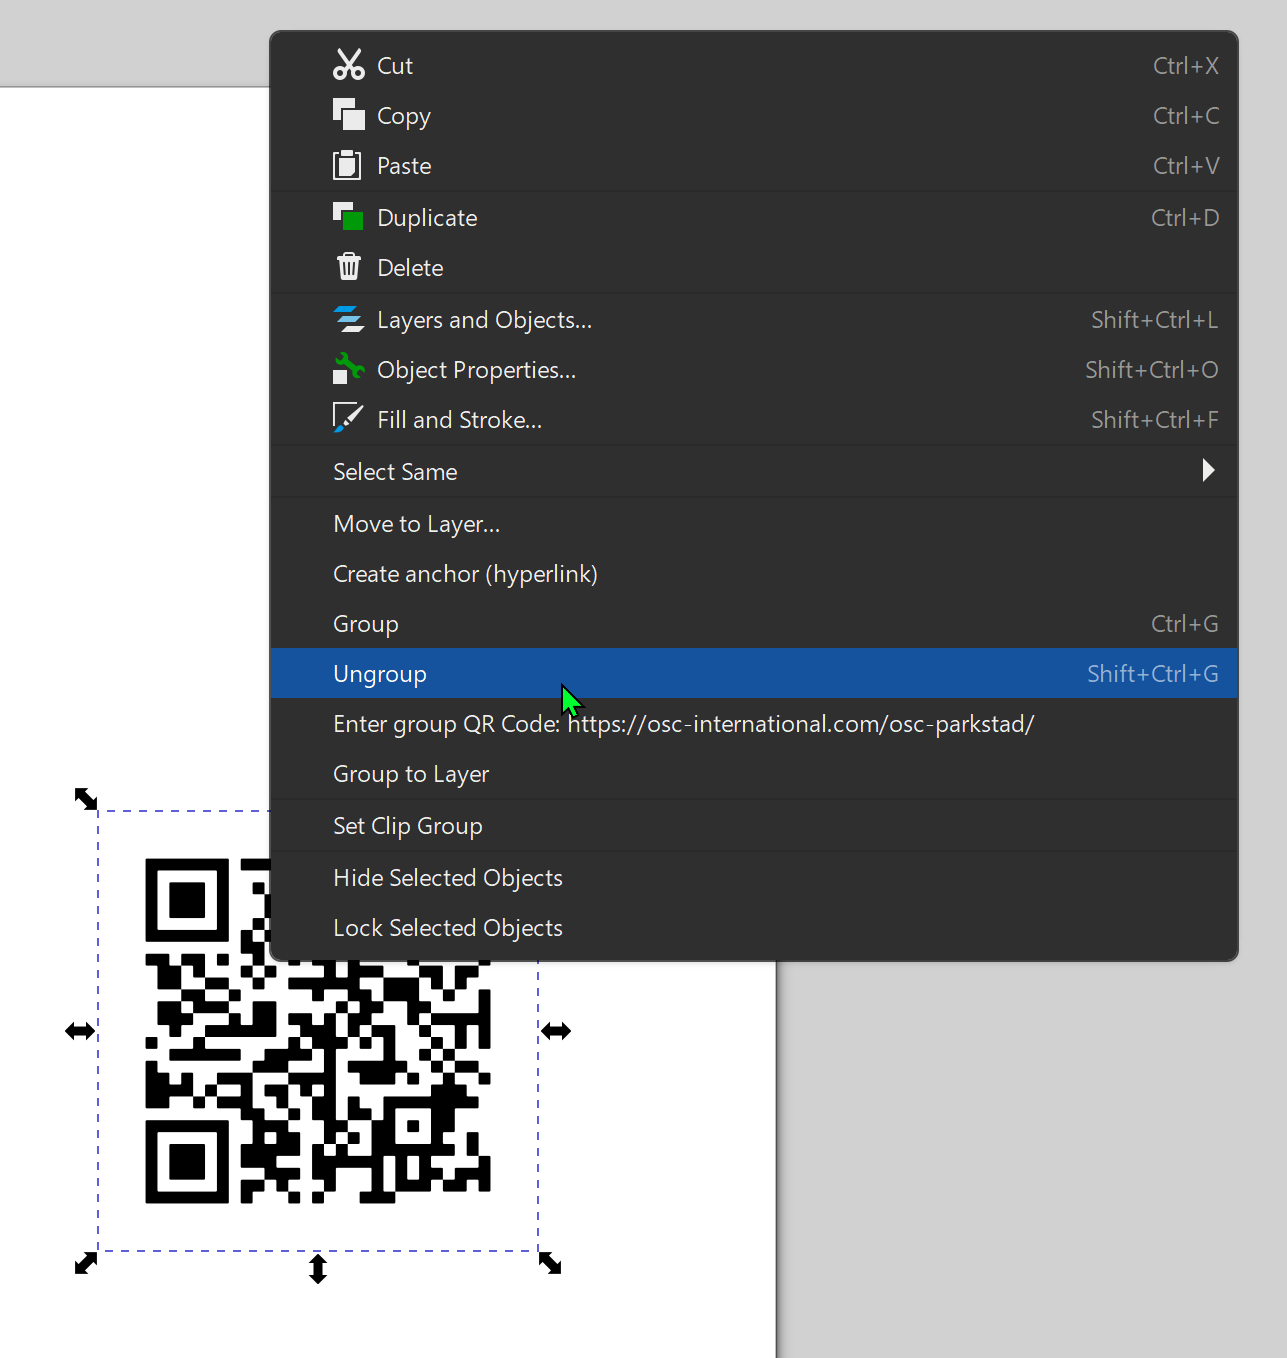
Then, hit “Apply” and the QR code is created. It consists of a number of objects (well, they’re called “paths” in InkScape; there’s something else that’s actually called an object - sorry for the confusion!). First, a group of the background (a larger white square) and the foreground (the QR code squares/objects). That foreground is a group of all the tiny little squares.

First, select the QR-code group and ungroup the foreground and background so you can delete (or adjust) the background. You do this by rightclicking it and selecting “ungroup”, or by selecting it and hitting CTRL-SHIFT-G.
Then edit it further (you may want to ungroup into separate objects/paths first). You can edit the colors, and if the level of error correction you chose allows it, you can place a white square (or other color/shape) in front of some of the QR code and place a logo (or some text) inside it.
![]()
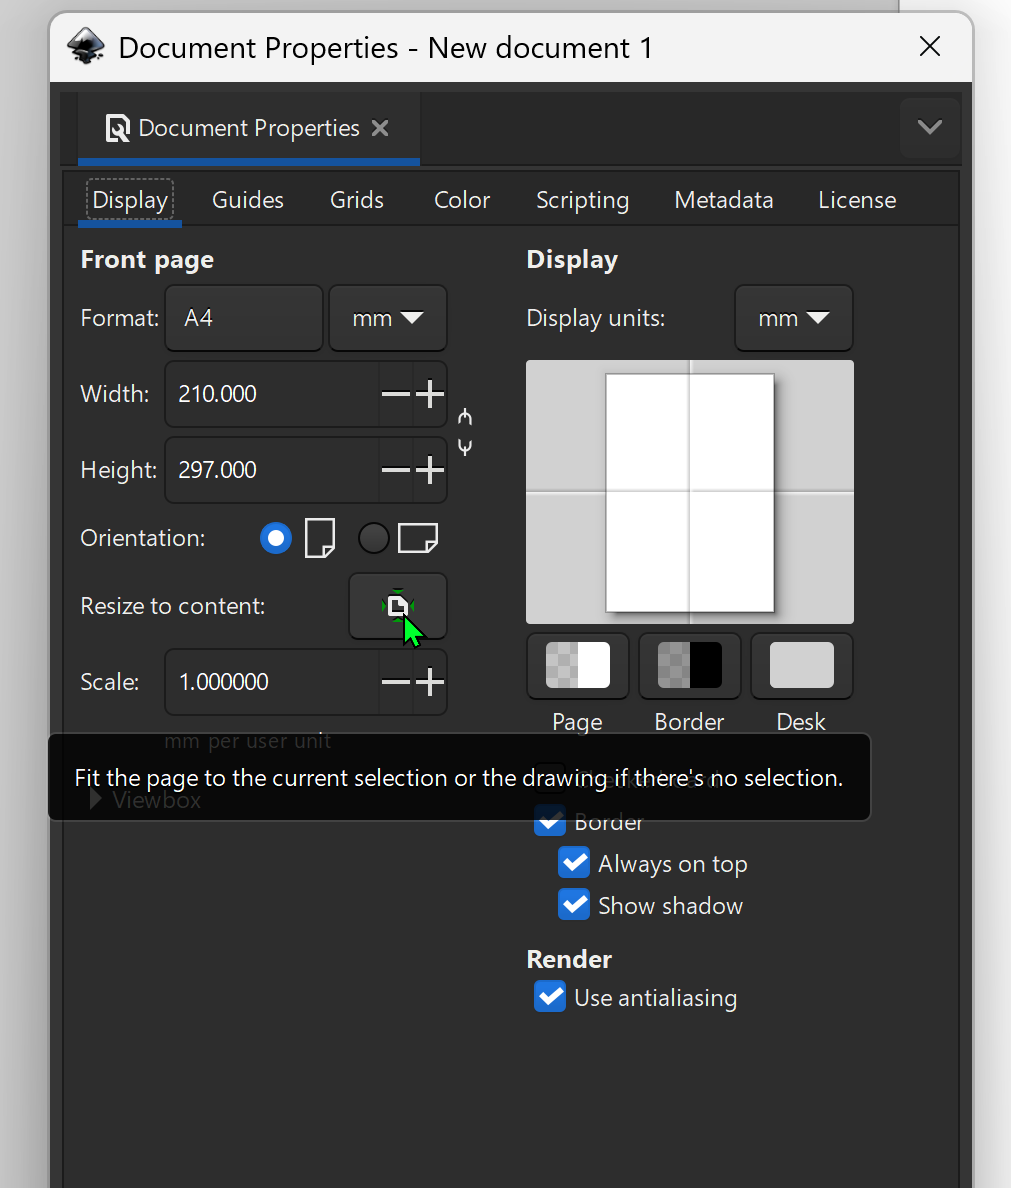
When you’re happy, don’t forget to adjust the page to the size of your QR code (SVG files have a kind of ‘page’ displaying the content). To do that, open the File menu and select the Document Properties option.

In the dialog that then opens, click the “Resize to content” button to, well, resize the page to the content.
If you’re a scientist, check this post too, about pro conference tips: https://sciencer.eu/posts/2024-08-open-science-conference-contributions-pro-tips.html
(actually, unfortunately, the OSF meetings service was discontinued… 😭)
And that was it! I hope it’s useful to somebody 🙂